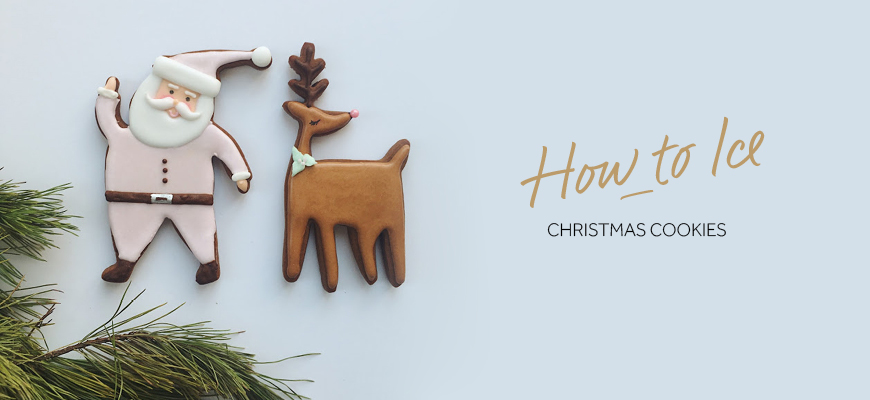
This week we are showing you how to decorate your Christmas cookies with royal icing. Royal icing is a hard white icing, made from softly beaten egg whites, icing sugar, and sometimes lemon or lime juice. It is used to decorate Christmas cakes, wedding cakes, gingerbread houses and many other cakes and cookies. By keeping your icing simple you can create the best Christmas cookies this year with a few easy steps. Simple doesn’t mean boring either – use beautiful icing colours, a few stencils and you are ready to decorate like a pro!

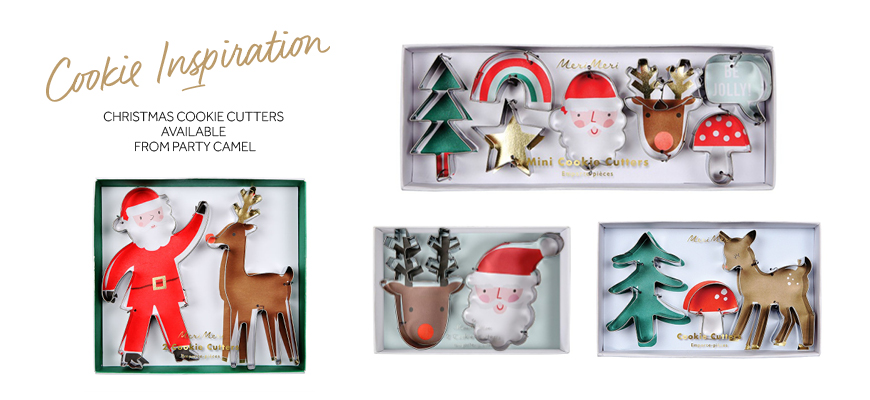
The first step is to find a good cookie dough recipe. You can opt for a Sugar Cookie Dough or Gingerbread Cookie Dough. Steer clear of thin, crispy cookies as they might break once you start the icing process. Use our selection of cookie cutters for lots of different styles. We have a huge variety for you to choose from.
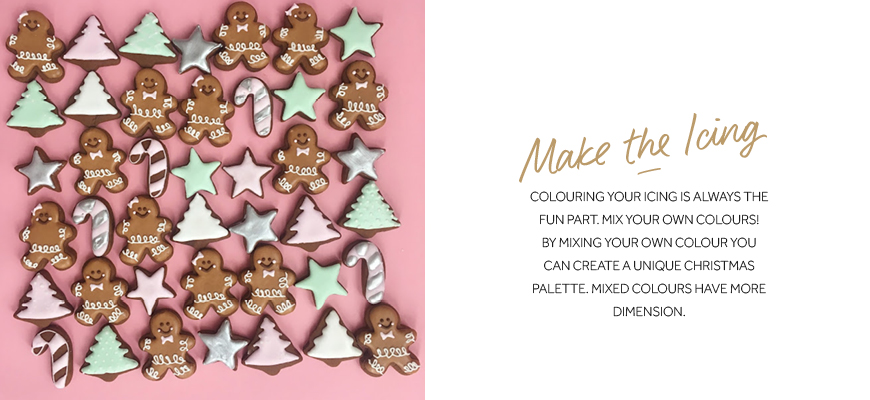
Once your cookies are ready, the real fun begins. There are tons of royal icing recipes, some work better than others, some taste better. This is one we have tried and tested and we say consistency is everything! It takes a bit of adding tiny drops of water until you have the perfect consistency to work with. Mix all your colours before you start! Royal icing will dry quickly so place a damp paper towel and a dish on top (you can also use plastic wrap or a Tupperware container) so it does not dry out.
ROYAL ICING INGREDIENTS
- 4 cups (500 g) confectioners' sugar
- 1/4 cup (40 g) meringue powder
- 1/4 cup (60 ml) cup water, plus little more for thinning
- 1 teaspoon lemon juice, plus more for bowl
- 1/2 teaspoon extract of your choice (if you want pure white icing, you will want to use clear extract)
- Gel food colour in your choice of colour
OPTIONAL
In addition, you will require the following kitchen tools:
- Kitchen Aid or a good mixer
- Pastry decorating bags
- Standard couplers
- Decorators tips
- Toothpicks
- Gel food colours
- Paper Towel
TO MAKE THE ICING
- Use a paper towel to wipe the bowl of an electric mixer and a rubber spatula with a few drops of lemon juice. Add all of the ingredients into the bowl and fit the mixer with the paddle attachment.
- Mix ingredients on low-speed for 12 minutes.
- Stir in small increments (1 teaspoon at a time) of water until you reach a "10-second" consistency, which means when you run the tip of a knife through the icing, the line disappears in 10-seconds. This will result in an ideal consistency for outlining and filling the cookies.
- Keep royal icing covered with plastic wrap at all times. Store with a damp cloth and plate (same diameter as top of bowl) on top in bowl in refrigerator and it keeps for up to 3 days.
- Tint about one-third of the icing with one of your selected colours using a tiny dab of gel paste colour. Fit a pastry bag with a coupler and pastry tip and fill the bag two-thirds full with the coloured icing and secure the bag with a rubber band. Keep the tip tucked into a damp cloth when not in use. Repeat with the remaining icing, this time tinting it in another colour of your choice.
SEAMLESS DECORATING
Now you have to work quickly, pipe the outline first. To keep your cookies seamless, fill in right away. Make sure to start around the outside and then fill in the entire inside surface, be generous with the icing. Use a toothpick to gently swirl it all together. If you're adding more decorations or drawing on the cookies, make sure to let them dry for at least 4 hours. If you're adding polka dots or want to try the wet-on-wet technique, do that now. Make sure to let them dry for 12 hours before placing in bags and 24 hours before stacking. Let the kids have fun with theirs, after all they do not need to be perfect. These cookies are great to make ahead and a fun activity with the kids. You can then pack them up to give as gifts for teachers and friend. Store them in air tight containers in a cool dry place once you have batch made.


Most importantly have fun with this activity.
Happy Icing!
CREDITS:
Icing recipe from Sweetapolita
Pastel Santa and Reindeer cookies from The Party Parade
Red Santa and Gilded Reindeer cookies