Amanda Dias loves to craft and she turned her passion into a hobby and a blog Raising My Knight . She now not only gets to do what she loves but also spend quality time with her son. pure genius we say! Here she shows us how to create a simple yet stunning Pinata you can craft with your little ones. Then decorate your home during ramadan and let the kids have fun with it on Eid morning.
What’s a party without a piñata?
This is an easy way to make a piñata and doesn’t involve paper Mache or long waiting hours. I’ve made it using things that are easily available at home except for the gift-wrapping paper. This one is a winner for sure.
Cost 3AED
So, what are you waiting for?
Let’s get started…
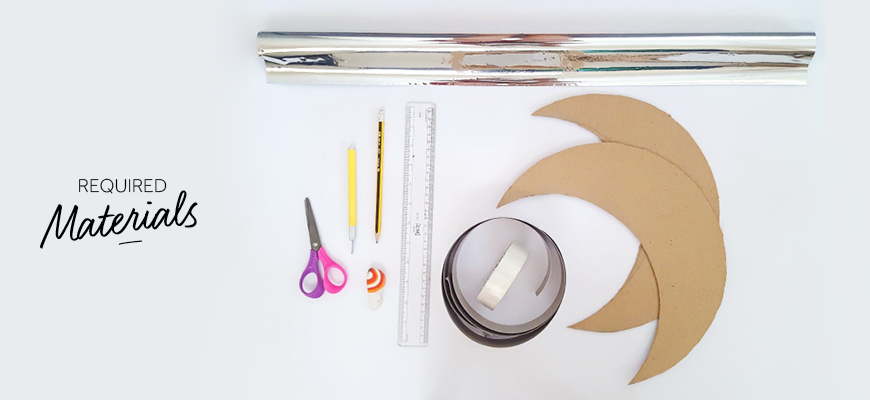
Materials required:
- Recycled cardboard (12-inch x 12-inch) (I used left over cardboard from a toy box )
- Soft cardboards (2-inch width) for the sides (I use the cardboard from the back of a flip chart)
- Cutter
- Transparent tape
- Double sided tape
- Twine/thick thread
- Silver gift wrapping paper
- Scissor
- Ruler/measuring tape
- Pencil and eraser
- Piñata fillings (if required)
DIRECTIONS
STEP 1
First draw a 12-inch circle using that as your template roughly sketch a crescent shape. Once you have sketched your final print use a cutter to cut out two crescent shaped pieces out of the cardboard.
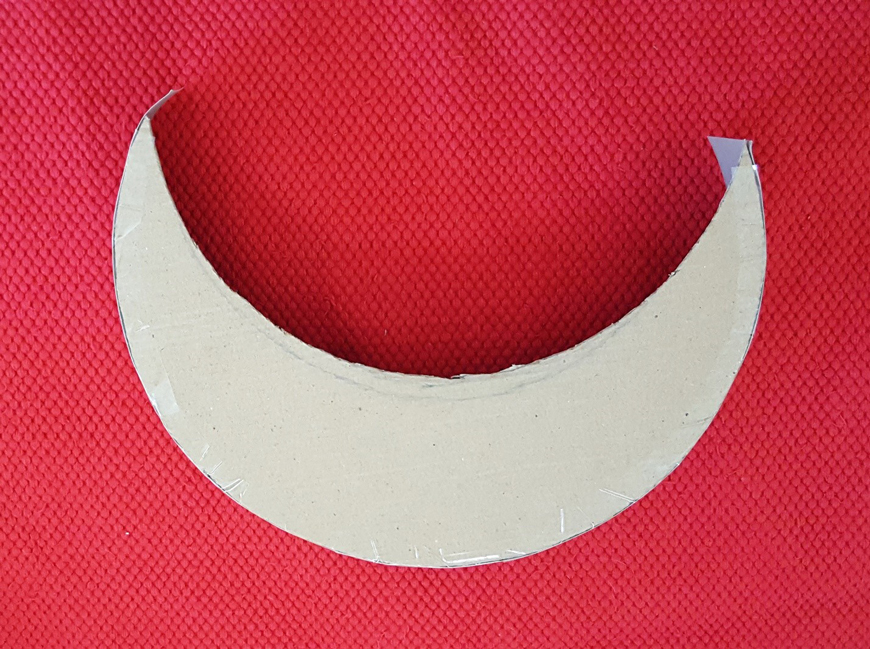
(Ours measured 4-inches/10cms wide and 30cms in length from tip to base)
Now that we’ve got our template ready let’s move to the assembling part.
STEP 2
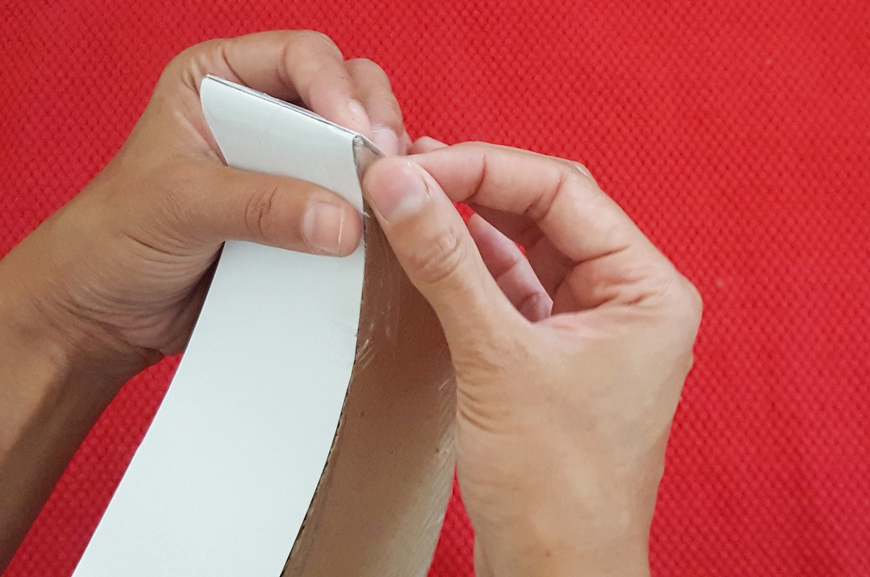
Start taping the soft cardboard to the side of one crescent shaped cardboard. Use smaller pieces of tape as you approach the curved edges.
Leave a little extra cardboard around the end before you cut off the extra bit.
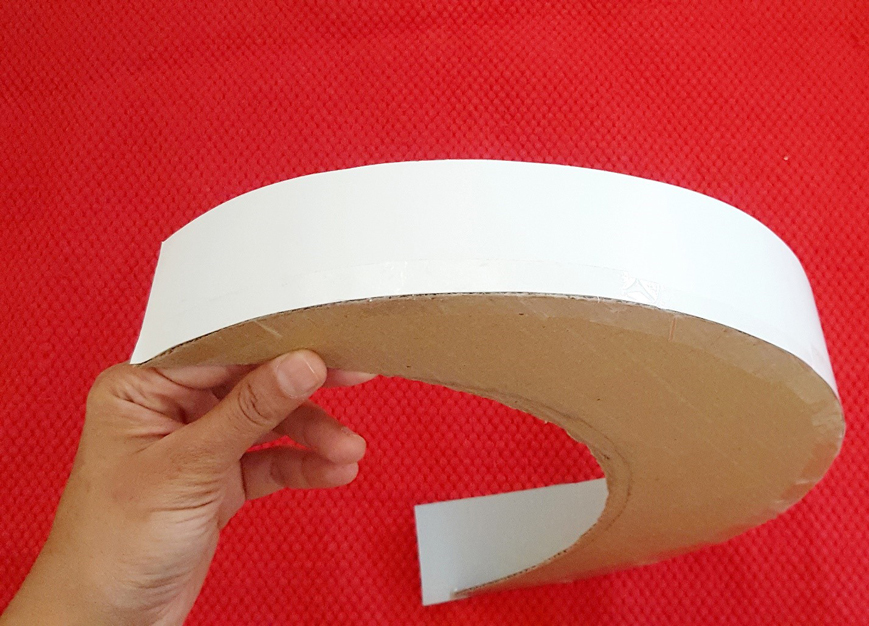
STEP 3
We got one side of our crescent done
Place your twine through the taped side and secure in place with a tap from the inside. This will keep the twine in place and restrict its movement. Keep the twine/thread as long as possible.
STEP4
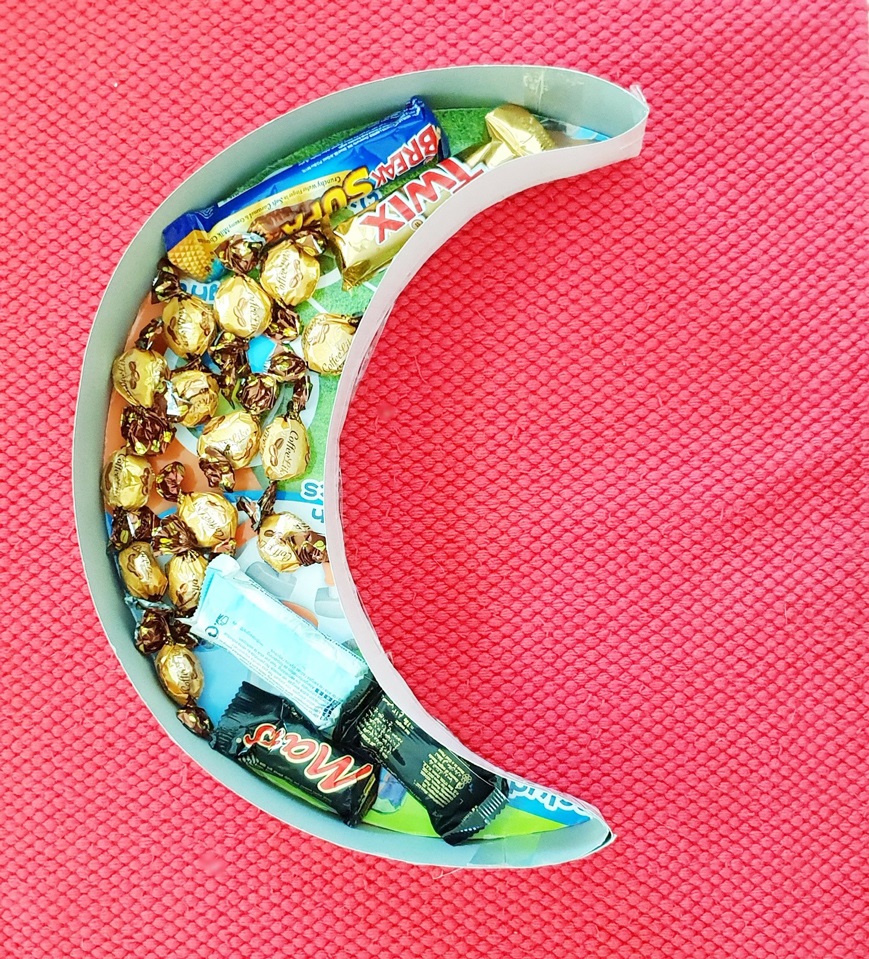
If you are using this as a piñata make sure you put your piñata fillings now before we seal it.
STEP 5
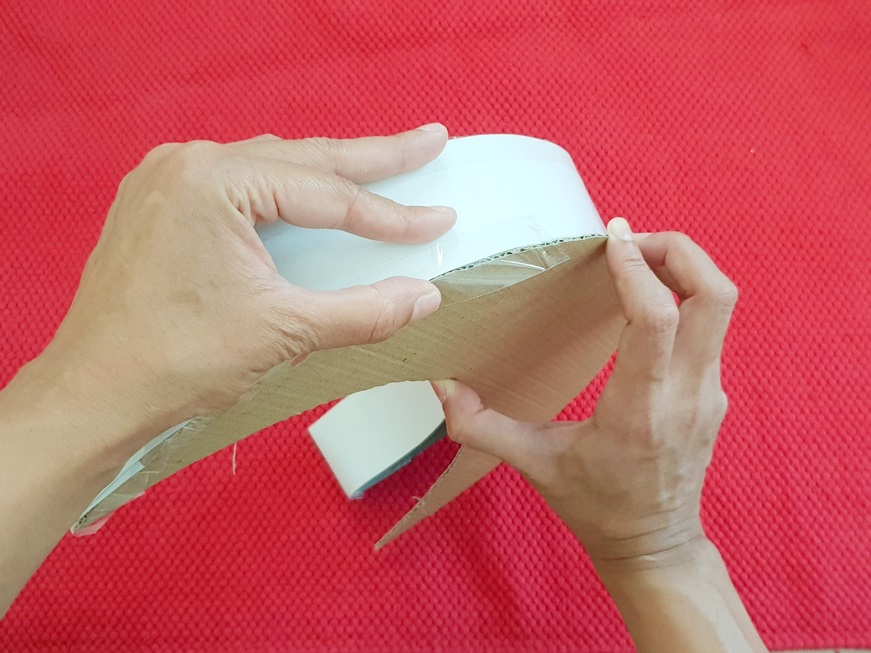
Place the second crescent cardboard and start taping it to the side using medium to small pieces of transparent tape around the curves.
Our crescent moon piñata is almost ready.
STEP 6
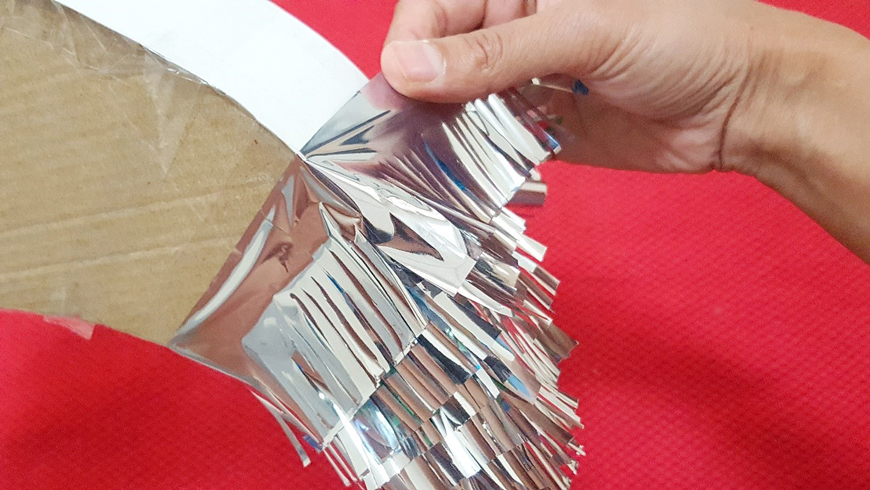
Now for the fringe! Cut your silver wrapping paper into streamers of 2-inch in width. Cut the fringe at the bottom half a centimeter apart leaving 2cms from the top. You can fold them into multiple layers to make the cutting process quicker.
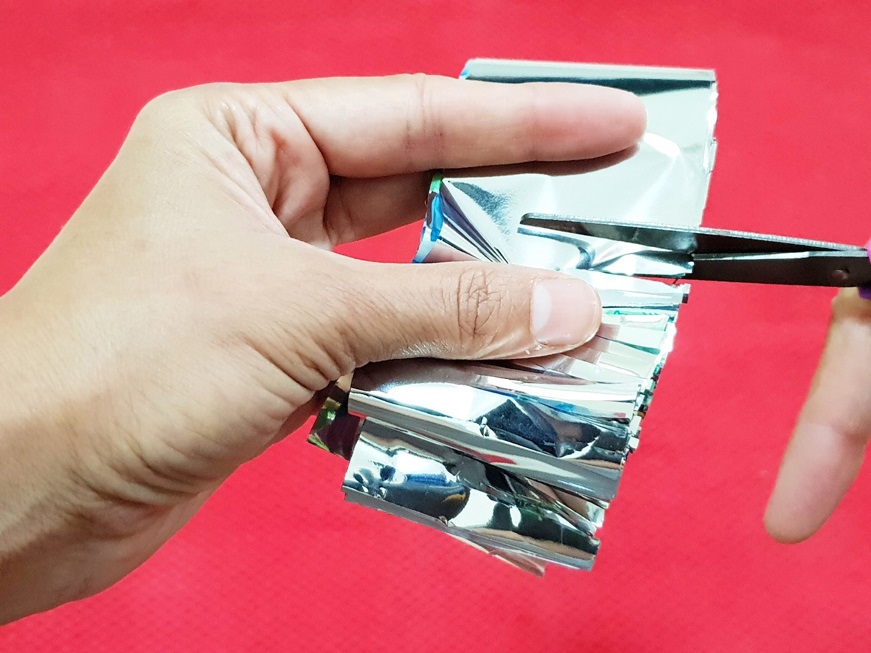
We used roughly 8 streamers to wrap the piñata.
STEP 7
Starting from the bottom place your double-sided tape and start wrapping your fringe roughly leaving a spacing of half an inch between each layer. Continue until its fully covered. You can use a scissor to trim out the excess fringe especially at the tips to give it a sharper look.
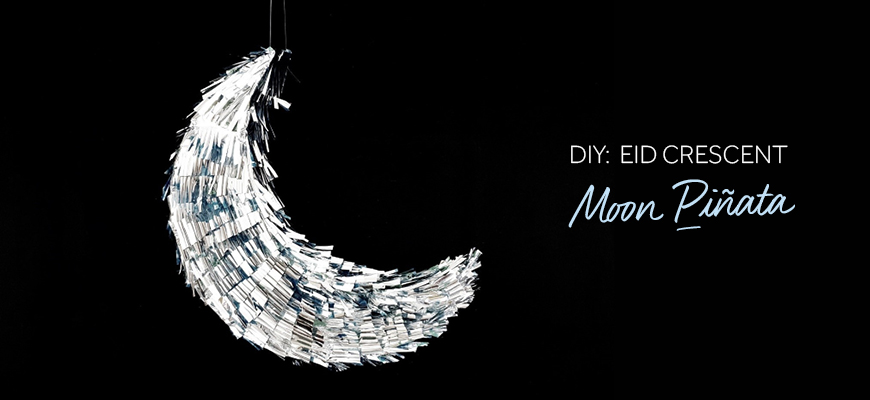
Ta daa!! Your Eid crescent shaped moon Piñata is ready. Oh! the feeling of pride when you have made something all on your own. Hang around your home as decoration and lets the kids open on Eid morning.